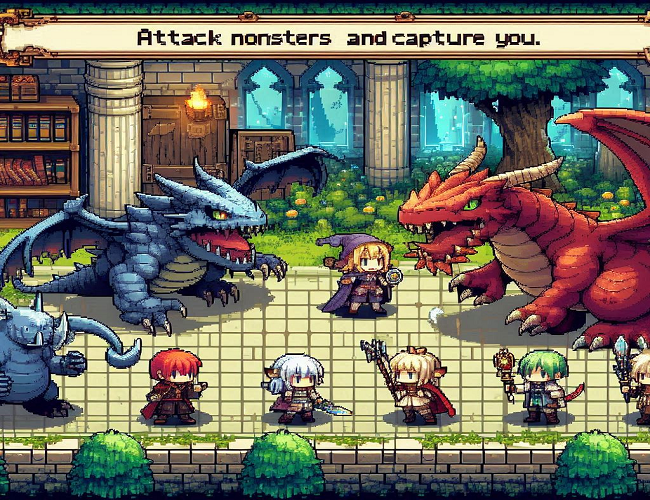
PLK_CatchMonster
A downloadable game
* Terms of Use * No duplication or distribution is permitted. Can be used in commercial games I ask you to specify "Palatkorn" in your game credits only
This plugin can catch the same character repeatedly without limit because it always creates a new character ID, no overlapping.
1. Skill-Based Recruitment Configuration (RecruitSkillConfig)
This configuration defines how enemies can be recruited using specific skills. Each entry corresponds to an enemy that can be converted into an actor when targeted by the designated skill.
| Parameter | Type | Description | Example |
| enemyId | Number | The Enemy ID that will be converted into this new actor. | 1 |
| actorName | String | The name of the new actor. (Leave blank to use the enemy's name) | Gobby |
| classId | Number | The Class ID of the newly created actor. Must correspond to an existing class in your database. | 2 |
| faceName | File | The filename of the face image located in img/faces. | GobbyFace |
| faceIndex | Number | The index of the face image (ranging from 0 to 7). | 0 |
| characterName | File | The filename of the character image located in img/characters. | GobbyCharacter |
| characterIndex | Number | The index of the character image (ranging from 0 to 7). | 1 |
| svBattler | File | The filename of the SV Battler image located in img/sv_actors. | GobbySV |
Example: Skill-Based Recruitment Configuration
| enemyId | actorName | classId | faceName | faceIndex | characterName | characterIndex | svBattler |
| 1 | Gobby | 2 | GobbyFace | 0 | GobbyCharacter | 1 | GobbySV |
| 2 | (Blank) | 3 | OrcyFace | 1 | OrcyCharacter | 2 | OrcySV |
2. Item-Based Recruitment Configuration (RecruitItemConfig)
This configuration defines how enemies can be recruited using specific items, along with the chance of successful recruitment.
| Parameter | Type | Description | Example |
| item | Item | The Item used to recruit enemies. (Select from the item list) | Recruitment Elixir |
| recruitChance | Number | The percentage chance (0-100) of successfully recruiting an enemy using this item. | 75 |
Example: Item-Based Recruitment Configuration
| item | recruitChance |
| Recruitment Elixir | 75 |
| Magic Scroll | 50 |
🛠️ How to Configure the Plugin Using Tables
Step 1: Accessing Plugin Parameters
- Open your RPG Maker MZ project.
- Go to the Plugin Manager by clicking the Plugin Manager button in the toolbar or pressing
F10. - Select PLK_CatchMonster from the list of installed plugins.
Step 2: Configuring Skill-Based Recruitment
- Set the Recruitment Skill ID:
- Locate the RecruitSkillID parameter.
- Enter the Skill ID that players will use to recruit enemies.
- Define Skill Recruitment Configurations:
- Find the RecruitSkillConfig parameter.
- Click the Edit button (usually represented by a pencil or gear icon).
- For each enemy you want to be recruitable via the skill, add a new entry and fill in the parameters as per the Skill-Based Recruitment Configuration table above.
Step 3: Configuring Item-Based Recruitment
- Define Item Recruitment Configurations:
- Locate the RecruitItemConfig parameter.
- Click the Edit button.
- For each item you want to use for recruitment, add a new entry and fill in the parameters as per the Item-Based Recruitment Configuration table above.
Step 4: Implementing Recruitment in the Game
- Skill-Based Recruitment:
- Assign the recruitment skill (with the specified RecruitSkillID) to an actor or enemy.
- During battle, when the skill is used on a specified enemy, the recruitment process will be triggered based on your configurations.
- Item-Based Recruitment:
- Ensure that players have access to the recruitment items defined in RecruitItemConfig.
- During battle, use the recruitment item on a specified enemy to attempt recruitment with the defined chance.
🎯 Example Configurations
A. Skill-Based Recruitment Example
Suppose you want to allow players to recruit a "Goblin" enemy into the party as an actor named "Gobby" using a skill with ID 10.
- Create the Recruitment Skill:
- Name: Charm
- ID: 10
- Type: (Define as needed, e.g., Magical, Support)
- Configure
RecruitSkillConfig:
| enemyId | actorName | classId | faceName | faceIndex | characterName | characterIndex | svBattler |
| 1 | Gobby | 2 | GobbyFace | 0 | GobbyCharacter | 1 | GobbySV |
- enemyId:
1(Assuming Goblin has ID 1 in your database) - actorName:
Gobby - classId:
2(Ensure class ID 2 exists) - faceName:
GobbyFace(Ensure the file exists inimg/faces) - faceIndex:
0 - characterName:
GobbyCharacter(Ensure the file exists inimg/characters) - characterIndex:
1 - svBattler:
GobbySV(Ensure the file exists inimg/sv_actors)
B. Item-Based Recruitment Example
Suppose you have an item called "Recruitment Elixir" with ID 5 that has a 75% chance to recruit an "Orc" enemy into the party.
- Create the Recruitment Item:
- Name: Recruitment Elixir
- ID: 5
- Configure
RecruitItemConfig:
| item | recruitChance |
| Recruitment Elixir | 75 |
3.Configure RecruitSkillConfig for Orc:
| enemyId | actorName | classId | faceName | faceIndex | characterName | characterIndex | svBattler |
| 2 | Orcy | 3 | OrcyFace | 1 | OrcyCharacter | 2 | OrcySV |
2 (Assuming Orc has ID 2 in your database)Orcy3 (Ensure class ID 3 exists)OrcyFace (Ensure the file exists in img/faces)1OrcyCharacter (Ensure the file exists in img/characters)2OrcySV (Ensure the file exists in img/sv_actors)🛡️ Troubleshooting
1. Recruitment Not Working as Expected
Cause:
- Incorrect configurations in
RecruitSkillConfigorRecruitItemConfig. - Missing or incorrect
classIdreferences. - Missing image files specified in the configurations.
Solution:
- Check Configurations:
- Ensure that every
enemyIdinRecruitSkillConfigcorresponds to an existing enemy in your database. - Verify that
classIdexists and is correctly referenced.
- Ensure that every
- Verify Image Files:
- Confirm that all specified
faceName,characterName, andsvBattlerimages exist in their respective directories (img/faces,img/characters,img/sv_actors).
- Confirm that all specified
- Review Recruitment Chances:
- Ensure that
recruitChancevalues are set correctly (0-100). A value of0%means recruitment will always fail, while100%guarantees success.
- Ensure that
- Use Console Logs:
- Open the developer console (
F12orCtrl+Shift+I) to view log messages that can help identify where the process is failing.
- Open the developer console (
2. New Actor Not Adding to Party
Cause:
- Issues in actor creation or party addition logic.
- Duplicate actor IDs causing conflicts.
Solution:
- Ensure Unique Actor IDs:
- The plugin automatically assigns the next available actor ID. Ensure that your
$dataActorsdatabase doesn't have gaps or conflicting IDs.
- The plugin automatically assigns the next available actor ID. Ensure that your
- Verify Class Parameters:
- Make sure that the
paramsandtraitsare correctly copied from the class during actor creation.
- Make sure that the
- Check Party Addition:
- Confirm that the new actor is successfully added to
$gamePartywith$gameParty.addActor(newActorId).
- Confirm that the new actor is successfully added to
💡 Additional Tips
- Backup Your Project:
- Always create backups before installing or updating plugins to prevent data loss.
- Consistent Naming Conventions:
- Use clear and consistent names for actors, classes, and images to avoid confusion during configuration.
- Testing:
- Thoroughly test recruitment scenarios in various battles to ensure the plugin behaves as expected.
- Customizing Recruitment Messages:
- Modify the recruitment success and failure messages in the plugin code if you wish to personalize feedback to the player.
- Extending Functionality:
- Consider adding additional parameters or features, such as experience points for recruited actors, to further enhance gameplay.
📝 Final Notes
The PLK_CatchMonster.js plugin is a powerful tool to enrich your RPG Maker MZ game by introducing dynamic recruitment mechanics. By carefully configuring both Skill-Based and Item-Based Recruitment, you can create engaging and strategic battles that reward players for their ingenuity.
Key Points to Remember:
- Correct Configuration: Ensure that all plugin parameters are correctly set, with valid enemy IDs, class IDs, and image files.
- Recruitment Chances: Balance recruitment chances to maintain game difficulty and player satisfaction.
- Actor Setup: Properly define all necessary properties for new actors to prevent in-game errors.
- Testing: Regularly test the recruitment mechanics in different battle scenarios to ensure seamless functionality.
If you encounter further issues or need additional customization, feel free to seek assistance or consult the RPG Maker MZ community for support.
Happy game developing!
Purchase
In order to download this game you must purchase it at or above the minimum price of $2 USD. You will get access to the following files:
Leave a comment
Log in with itch.io to leave a comment.